The page that I'm talking about is below:
Click here to check my extremely popular old blog link
I wrote an article about 'how to connect GPRS enabled phone to Computer or Laptop' from my then local phone company's prospect. And lots of people are searching the same keywords which land them to my old blog page. I get tons of emails asking me how to connect their mobile phone to laptop and so. I've to answer them and usually refer them to my old blog page when I'm too busy.
One big mistake I did was I didn't put any image and it really made some of them not read my article and when they wanted some precise answer, they reached me through mails and comment box. I've been writing them back to read my that article but seems like they are not really caring. Today, nobody likes to read an article without some sort of wrapped images on it. That's my conclusion because I'm getting same repetitive questions on and on. I'm tired of telling them to go through my article on and on.
Finally, I changed my mind and now I'm here with the article which is just the updated version of the same old article. The only difference is the images being used for this walkthrough and updated configuration details.
HOW TO CONNECT YOUR GPRS ENABLED CELL(MOBILE) PHONE TO YOUR COMPUTER OR LAPTOP
Here I'm writing this article in the context of Kathmandu's mobile phone company with the popularly branded name 'MERO MOBILE' which recently is being promoted as 'RAMRO'. (FYI, 'MERO' means 'MY' and 'RAMRO' means 'Good')
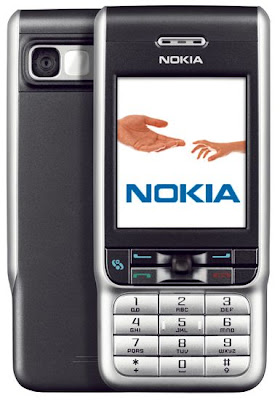
The phone being used solely for this article is NOKIA 3230. Once very expensive prized possession now easily affordable.
NOTE: Irrespective of any wireless phone companies and mobile phones, the steps that I'm going to show should generally work for all. The only thing that matters is the configuration details of different phone companies and undeniably phone should support GPRS technology otherwise it wouldn't work.
So, lets get ready, how to connect to Internet using your GPRS enabled phone(via USB Cable).
Requirements:
Phone: Nokia 3230
Network: MeroMobile(NEPAL)
Software: CD bundled with your Phone(If you've lost your CD, download the phone software from the phone company's website.)
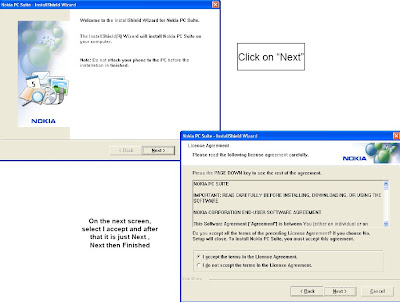
Step 1. First Install the Software from the CD.
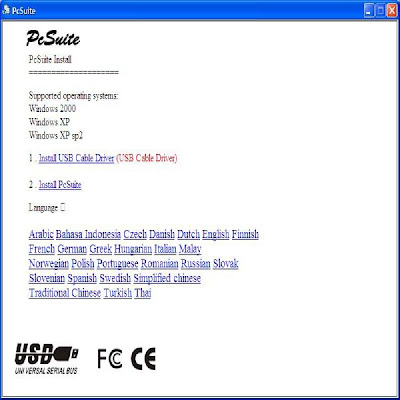
As you see,firstly we are going to install USB Connectivity driver for the phone. (Newer phones should come with one setup files.)
Step 2. When prompted, Click 'Run'
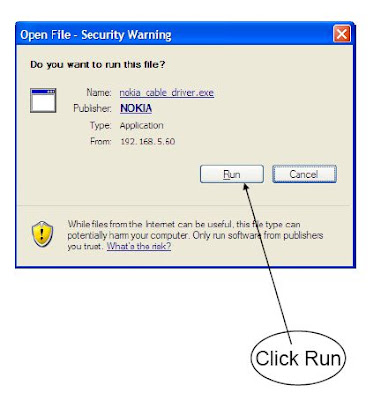
When you click 'Run', installation will copy the files to ready the installation as follows:
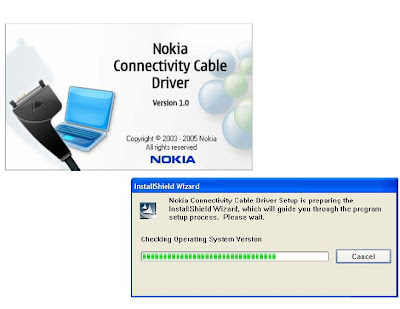
Step 3. Rest is self-explanatory. Click Next, and "I accept.." option.
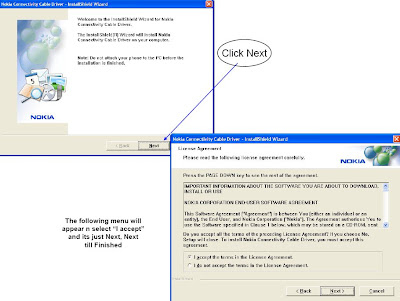
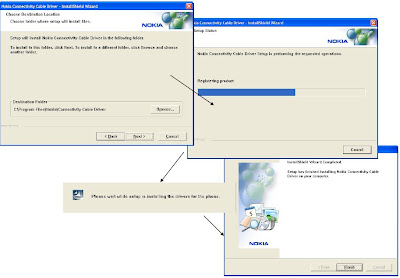
When done, click 'finish' button.
USB Cable driver is installed.
Now that the road is paved between Modem and Computer. Lets find a car to ride on the road. Literally, I'm talking about PC to Mobile synchronizing software(In Nokia World, it's generally termed as Nokia PC Suite) which usually comes bundled with the mobile phone you buy. With the help of PC Sync software, you can transfer files back and forth, share internet connectivity of GPRS phone in Desktop Computer/Laptop etc.
Step 4. Lets Install Nokia PC Suite. This time click where it says Nokia PC Suite.
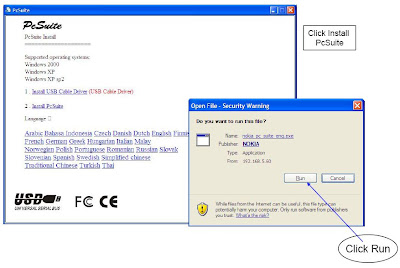
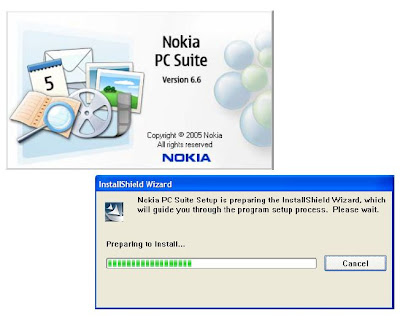
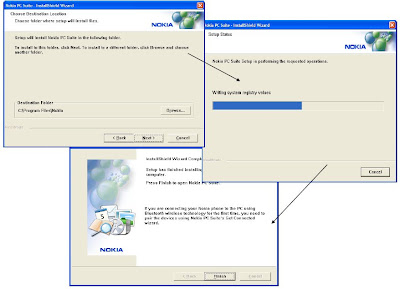
Step 5. As soon as you finish the installation of Nokia PC Suite Software. You'll see the screen like below:

Step 6. Next screen will ask you for USB cable connection.
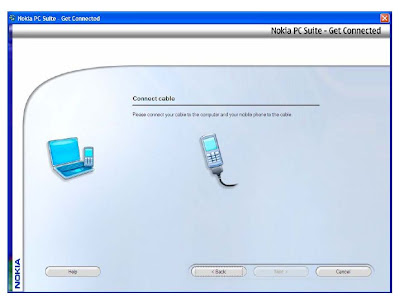
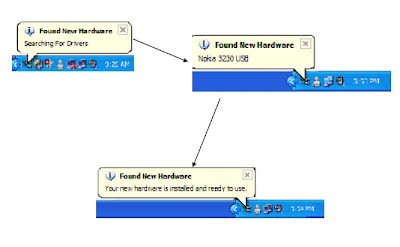
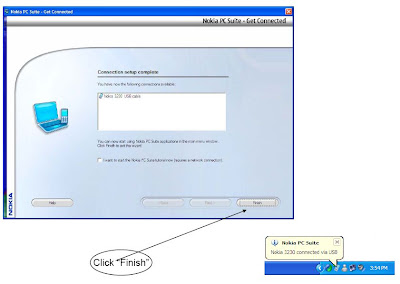
Step 7. Now comes the dashboard for your Nokia Phone. Not really, but it's from here you take control of all the features of your phone. Technically speaking, we are most probably interest on 'Connect to the Internet' link.
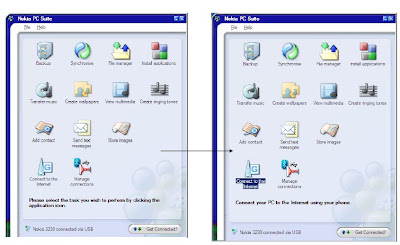
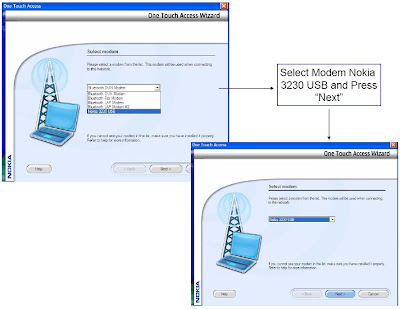
Step 8. Before I write anything else. One thing you need to know is when you install your PC Suite, it will install everything needed for any kind of connection. It will install dial up components not only for cable connection but for bluetooth and other type of connection too. We know we are trying to connect through USB cable(Select Bluetooth if you are going to make connection through bluetooth. It's little different that Cable connection. You are forcing your PC Suite software to scan for any bluetooth devices when you select Bluetooth mode. When found, you'll have to assign PIN or something like that which is self-explanatory but the concept is same. Just an information). We are going to select USB cable mode. I strongly don't recommend you to use Bluetooth for GPRS connection
Step 9. Next screen will ask you about your 'Network'. That means, it's asking for your mobile phone company details. Remember your phone is very strong in terms of receiving frequency. If you see all 5 lines on your set, then you are at the perfect area to connect to internet through your phone.
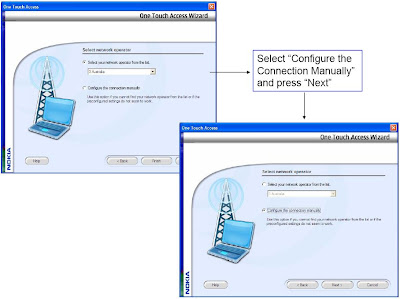
Step 10. Now is the main part to pay attention for. You might be given some sort of GPRS configuration details for you when you buy services from your mobile phone company. It usually comes to you as small leaflet along with the SIM card that you buy. The leaflet must have all the details on it. Make sure you read thoroughly before you make call to your phone company. 'Mero Mobile'(Spice Nepal) has setup a powerful access point which is used for distributing GPRS Internet connection within entire Kathmandu valley. GPRS is the radio technology used for wireless data communication for wide coverage. hmmm enough lecturing..
Mero Mobile's access point would be: 'mero' without quotes
(don't care about username and password if you've Mero Mobile GPRS service)
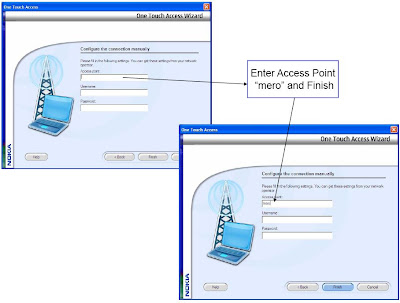
Step 11. Now, it's time to start an engine of a car. I mean we are good to go and connect right away. On the next screen, you'll be greeted with 'connection established.. ' message.
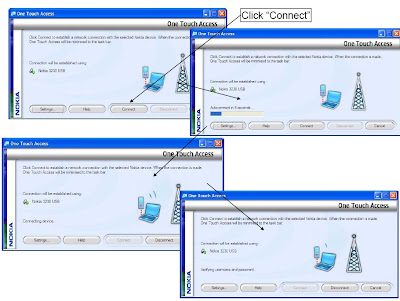
Step 12. If you are at reachable area, then you'll quickly see the screen like below.
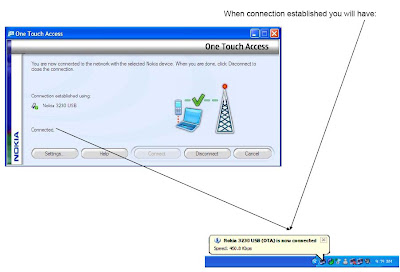
Fire up your browser and start surfing.
Thank you for reading.

Comments